Mobile Food Photography: Simple & Practical Tips
Imagine a plate full of colorful, aromatic food in front of you. You grab your phone and snap a picture, but the result isn’t what you expected. The colors look dull, the food doesn’t seem appealing, and something feels off. Now what? Do only professional cameras create mouthwatering photos? Not at all! Your smartphone, which is always with you, can capture images that make anyone hungry. You just need to learn a few simple tricks.
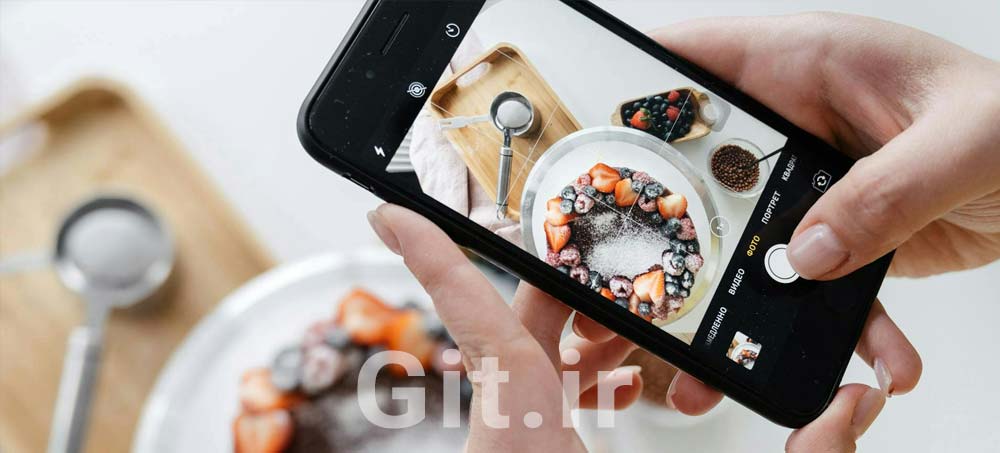
Food photography isn’t just about taking a simple photo; it’s a way to tell the story of flavors and share a visual experience. Why use a phone? Because it’s always accessible, requires no expensive equipment, and with a bit of creativity, can produce images that make waves on social media. These days, from Instagram to Pinterest, food photos have a huge following. Whether you want to show off your homemade dishes or attract customers to your restaurant or café, food photography with a phone is a skill worth learning.
In this article, we’ll show you how to take photos that are not only beautiful but also tell the story of the food effectively, using simple techniques and accessible tools. From lighting to editing, we’ve got you covered.
Table of Contents
- Lighting: The Key to Food Photography (Using What You Have)
- Composition: Smart Arrangement for Eye-Catching Photos
- Food Styling: Adding Appeal Before the Shot
- Phone Photography: Practical Settings
- Photo Editing with Your Phone: Completing the Magic
- For Pros: Additional Equipment and Advanced Tips
- Recommended Courses for Enthusiasts
- Conclusion
Lighting: The Key to Food Photography (Using What You Have)
Lighting is the most critical factor in photography, especially food photography. Even with the best phone, without proper lighting, your photos will look dull and uninspiring.
The Importance of Natural Light: Your Best Friend by the Window!
Natural light, specifically sunlight streaming through a window, is the best and simplest light source for food photography. Why? Because it’s usually soft, even, and true to life, showing colors accurately. Natural light avoids harsh shadows and adds texture and depth to food.
To find the best spot, look for the nearest window. Ideally, the light should come from the side or slightly behind the food, not directly from the front. Avoid direct sunlight, which creates harsh shadows and overly bright spots. Cloudy days or early mornings and late afternoons (golden hour) are the best times for photography.
Controlling Light with Simple Tools:
Softening Light (Diffusing): If the window light is too intense and creates harsh shadows, you can soften it. Hang a thin white curtain, a piece of parchment paper, or even a white t-shirt in front of the window. This diffuses the light, making shadows softer.
Reflecting Light: Sometimes, one side of the food may look darker than the other. To brighten these shadows and reflect light toward the food, use a piece of white foam board, a white cardboard, or even a white napkin. Place it opposite the shadowed area to bounce light back.
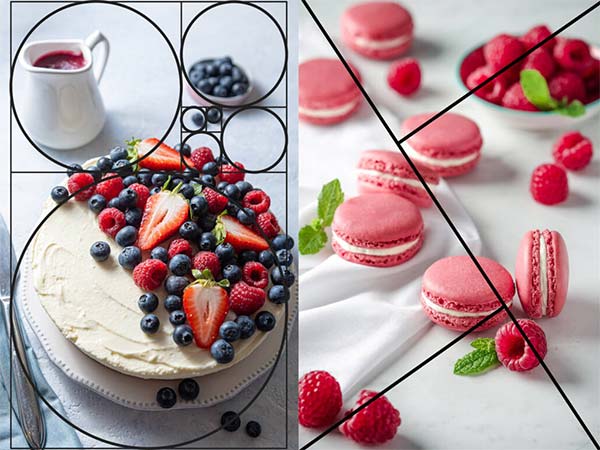
Composition: Smart Arrangement for Eye-Catching Photos
Composition is about how you arrange different elements in the frame to get the best result and make your photo visually appealing.
Choosing the Right Angle:
Picking the right angle can make a big difference in your photo:
Overhead View (Flat Lay): This angle is perfect for full table setups, breakfast spreads, or foods like pizza and sandwiches that look great from above. It creates a clean, organized, and visually appealing look.
45-Degree Angle: This is a common and versatile angle. It shows both the overall dish and some of its depth and height. It works well for most foods.
Close-Up (Eye-Level): If you want to highlight the texture and layers of a dish (like the layers of a cake, the texture of a burger, or sauce drizzling over food), choose this angle. Position the camera at the same level as the food.
Keeping the Background Simple:
To keep the focus on your food, choose a simple, uncluttered background. A plain wooden table, a linen cloth, or a stone or concrete surface can make excellent backgrounds. Avoid anything that distracts from the main subject. The goal is to ensure all attention goes to your delicious food.
Food Styling: Adding Appeal Before the Shot
Before you press the shutter, take some time to style and prepare the food. This makes your dish look fresh and appetizing in the photo.
Styling the Food:
Keep It Clean: Ensure the edges of the plate or dish are completely clean, with no smudges or food residue.
Fresh Garnishes: Adding fresh herbs like mint, parsley, or rosemary can bring color and a sense of freshness to the photo.
Shine and Freshness: Brush a bit of oil on cooked or grilled foods to make them look shiny. For fruits or salads, lightly spritz water to create a dewy, fresh look.
Using Simple Elements:
For storytelling and added appeal, you can use simple, complementary elements:
A spoon or fork elegantly placed next to the dish.
A napkin in a color that complements the food.
Some of the food’s raw ingredients (like a few basil leaves next to pasta or coffee beans beside a coffee cup) placed in a corner of the frame to convey freshness and authenticity.
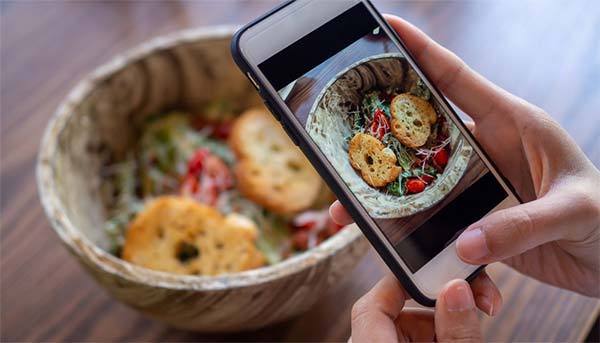
Phone Photography: Practical Settings
Now that everything is set, let’s dive into your phone and explore settings that help you take the best photos.
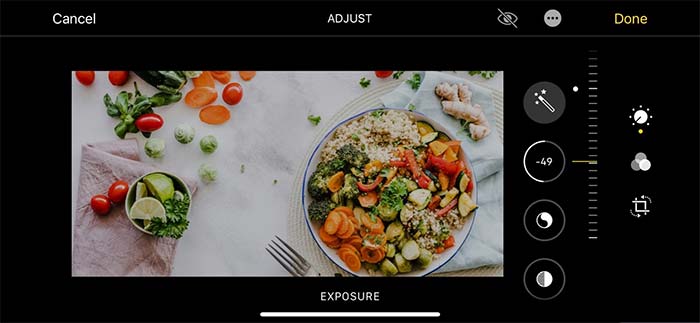
Manual Focus: It’s crucial that your main subject is sharp. Simply tap and hold on the part of the food you want to be clearest. This ensures the phone focuses on that spot.
Adjusting Exposure: After focusing, a small slider (like a sun or circle) usually appears next to the focus point. Drag it up or down to adjust the brightness of the photo. This helps prevent the image from being too dark or overly bright.
Portrait Mode: If your phone has this feature, use it. Portrait mode helps blur the background (create bokeh), keeping the focus on the food. This makes the dish stand out and look more professional.
Keep the Lens Clean: This simple but vital tip can’t be overstated. Always wipe your phone’s camera lens with a soft, clean cloth before shooting. Even a tiny fingerprint or smudge can blur or degrade your photo’s quality.
Photo Editing with Your Phone: Completing the Magic
Editing is the stage that turns good photos into great ones. You don’t need complex software; simple, free apps on your phone can make a huge difference.
Simple, Free Apps: Apps like Snapseed (available for Android and iOS) or even your phone’s built-in editing tools (like the photo gallery) offer great editing options.
Key Editing Adjustments:
Brightness and Contrast: Slightly increase brightness to make the photo livelier. Adjust contrast to add depth and make food details pop.
White Balance: This adjusts colors. If your photo has a yellow or blue tint, tweak the white balance to make colors look natural and appetizing.
Sharpening: A touch of sharpening can make food details clearer, but don’t overdo it to avoid an unnatural look.
Crop and Rotate: For better framing, crop out unnecessary parts of the photo. If the image is slightly tilted, use the rotate tool to straighten it.
Saturation: This boosts colors. Use it sparingly to make colors vibrant without making the photo look artificial.
For Pros: Additional Equipment and Advanced Tips
If food photography has become a serious passion, this section is for you. With a few extra tools and advanced techniques, you can take your photos to the next level.
Recommended Equipment:
Phone Tripod: To eliminate hand shake, especially in low light or when using a timer, a small phone tripod is essential. It provides complete stability.
Clip-on Lenses: These small lenses attach to your phone’s camera and add new capabilities:
Macro Lens: For capturing ultra-close details of food textures, like water droplets on fruit or sesame seeds on bread.
Wide-Angle Lens: For including more of the scene in the frame, like a crowded table or a restaurant setting.
Small LED Light Panels: These portable artificial lights often allow you to adjust temperature and intensity. They give you precise control over lighting, especially in environments with insufficient natural light.
Professional Reflectors and Diffusers: Available in various sizes and materials, these tools help reflect and diffuse light in a controlled way. For example, a golden reflector can add a warm tone to the food.
Photography Backdrops: These are flat surfaces with different textures and designs (like stone, wood, concrete, or fabric) used as backgrounds or surfaces for food, adding a unique vibe to your photos.
Advanced Techniques:
Using Pro Mode on Your Phone: Many advanced phones have a “Pro” or “Manual” mode in their camera. This lets you manually control ISO (light sensitivity), shutter speed (how long the camera captures light), and white balance. This manual control helps you achieve more precise, professional results in challenging lighting conditions.
Exposure Bracketing: This involves taking multiple photos with different exposures (one brighter, one normal, one darker) of the same scene. You can then combine them during editing to create a high dynamic range (HDR) image that retains details in both bright and dark areas.
Focus Stacking: To make every detail of a subject (like a long table of food) sharp from the nearest to the farthest point, take multiple photos with different focus points in the depth of field. Then combine them using specialized editing software for a fully sharp image with clear details.
Recommended Courses for Enthusiasts
These courses aim to enhance your skills in food photography with a phone and beyond:
1. Course: Food Photography: Capturing Food in Your Kitchen
- Description: With this food photography course, you’ll take better photos in no time using what you already have in your kitchen.
2. Ultimate Photography Course (Using iPhone)
- Description: In this course, you’ll learn iPhone photography, storytelling, camera settings, lighting, composition, and editing for beginners.
3. Course: Master Mobile Photography: Learn to Edit Photos with iPhone
- Description: Transform your iPhone photos with various editing techniques and take your mobile photography to the next level.
4. Course: iPhone Photography | Take Professional Photos On Your iPhone
- Description: This course is your online guide to stunning iPhone photography like a professional digital photographer. You’ll learn how to create depth in your photos and use surrounding light to properly illuminate your subjects.
Conclusion
As you’ve seen, you don’t need expensive equipment or complex photography knowledge to take delicious, eye-catching food photos with your phone. By following a few simple key tips, you can make a big difference:
Good Lighting (preferably natural light from a window)
Simple Composition that focuses on the main subject
Smart Styling to make food look fresh and appealing
Finally, a bit of editing to complete the magic of the image.
The most important thing in photography is practice and experimentation. The more you shoot and try different settings and lighting conditions, the better you’ll get. Enjoying the process and getting creative will pave the way to becoming a professional food photographer. Remember, the best camera is the one you always have with you: your smartphone! So start today and capture your tastiest moments. Are you ready to turn your food into a work of art?
Please Log in to leave a comment.